HOW-TO: Replace Starter Bushing
This HOW-TO covers removing and replacing the starter bushing in the A1/A2/A3 VW and their air-cooled cousins.
This is an important procedure any time the starter is removed, replaced, or if the bushing makes noise. In particular, most new Bosch starters come complete with a new bushing and a warning label that states the warranty is void if the bushing is not replaced.
DISCLAIMER:
- Use these instructions at your own risk
- Read them through from beginning to end before starting
- This is how I do things… it is not necessarily the right way nor the best way !
- Using equipment, tools, and supplies incorrectly could result in serious injury to you or your property or even death
Please note: You can click on any thumbnail below to see a larger version of the image. After viewing the large image, you can click anywhere outside the white image border to return to your spot in the text.
Parts needed:
1 new starter bushing
Supplies needed:
- general purpose grease (I use Canadian Tire’s finest)
- brake drum cleaner
- compressed air
Tools needed:
- 11mm tap (7/16″ should work as well) if working on a water-cooled VW, 12mm if air-cooled.
- 1/4″ socket and ratchet to drive the tap
- 7/16″ bolt and nut… used as a drift
- hammer

Step 1: Disassembly
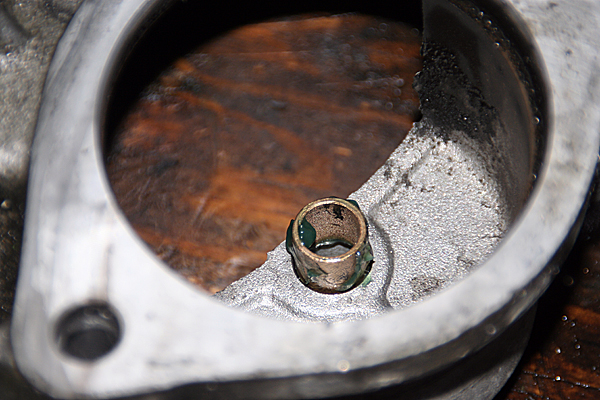
Start the tap in the bushing:

Use the 1/4″ socket to to rotate the tap:

As you rotate the tap it will eventually bottom out and then drive out the bushing:

Keep turning until you have completely removed the bushing:

If you find that the tap turns and bottoms out but doesn’t extract the bushing it may be that your bushing is so worn the threads are too thin with your current tap and you need to try the next size bigger.
Step 2 Reassembly:
Clean the hole with brake drum cleaner and compressed air:

Coat the new bushing with grease and place it in the hole:

Place the bolt/nut combination in the bushing:

Tap gently with a hammer:

This will completely seat the new bushing:

Add a bit more grease and it’s ready for the starter:

Tempting as it is, don’t overdo it with the grease… too much and your starter will be surprisingly difficult to reinstall!
I like to seal the greased bushing with tape to keep crap out of the grease until the starter is ready to install. A flap of tape reminds me that it’s there !!

End of Proceedure